Automatic preprocessing of product photos
There're several steps that you often want to do with product photos to make them look better. You may want to crop, resize, adjust white balance and so on. Of course you can do all this manually in GIMP, and get excellent results. But at least some of these tasks can be automated with more of less success.
In this article i demonstrate my ad hoc script to adjust white balance and clear the background.
All sample code should run in any modern browser.
Demo
Let's say we want to do this:
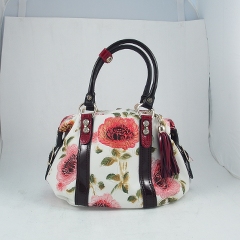
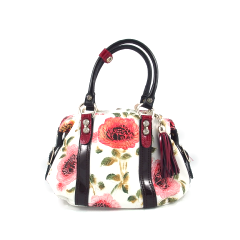
This demo tries to do exactly this.
(Note: It assumes that we shoot on white background and image is square.)
It's not just brightness-contrast adjustment (as it seems]), it's more intelligent and can handle more badly shooted photos.
Comments for the demo
The demo downscales image to two resolutions: 720x720 and 240x240. Then it does filtering at 240x240 (for speed), and adjusts 720x720 version according to information collected during filtering at 240x240.
Whole process consists of the following steps:
- Making two copies of image: 240x240 and 720x720
- Building deltamap (matrix of local gradients for all pixels)
- Finding and filling the background with white color
- Marking remaining pixels, dividing them to continuous segments
- Selecting one segment and clearing all other to delete artifacts from the background that were not erased in previous steps
- Calculation of color statistics and adjusting white balance according to it
- Some afterfiltering (make edges more sharp, make shadows more smooth)
- Quickly create 720x720 version of image using (interpolated) information from previous steps.
The quality of resulting images is not ideal, but you can consider it as sufficient, and the whole process is fully automatic in most cases.
I dont want to turn this article into tutorial on graphical algorithms, so i will not describe details. What i want to say instead is that all this was written without any books, O(n log n)
Edge filter
One of things that our algorithm calculates is deltamap (as i call it). Deltamap is a result of edge filter, it has bright pixels where image has sharp edges:
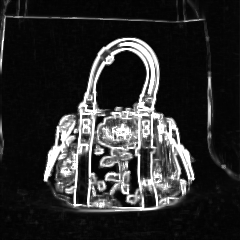
In its simplest form a pixel of deltamap can be calculated as a differences between brightness of current pixel with surrounding pixels. Thus, if we define difference between two pixels as
function colorDelta(x,y,xx,yy) {
  var dd = [0,0,0]
  for (var j = 0; j < 3; j++) {
    var a = g[y][x][j]
    var b = g[yy][xx][j]
    var d = Math.abs(a - b)
    dd[j] = d
  }
  return Math.sqrt(dd[0]*dd[0] + dd[1]*dd[1] + dd[2]*dd[2])
}
then we could do something like this to calculate delta map:
for x, y
  for dx = [-1,1], dy = [-1,1]
     deltaMap[x,y] += colorDelta(x+dx,y+dy)
That it. Through, i found it is more practical to calculate delta in wider areas of pixels. See buildDeltamap function in demo1.js for actual code.
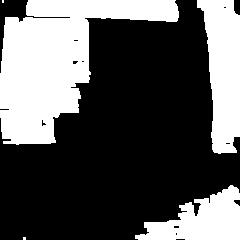
Filling background
Now we can use this information about sharp edges to separate background from object(s).
We can start from edges of image and fill all pixels where delta value is less than some threshold value.
In my particular implementation i do it iteratively: first i fill across x-axis, then across y, then repeat.


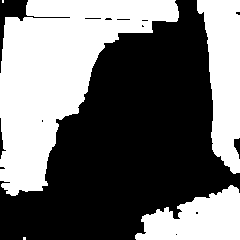
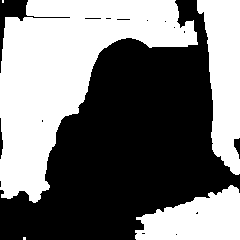
and so on. These images where done for threshold value of 8. As you can see many iterations are needed to fill background in this way, but we can increase threshold to say 32 and finish in one-two iterations. However many iterations are still required if shape of object is complex (not convex).
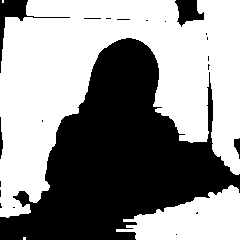
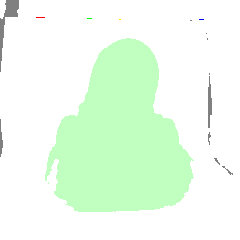
Segmentation
Segmentation is a process of dividing image into continuous areas. It is used in computer vision and other cool things.
We have already separated background from object(s). So all we need to segmentate our image is to find continuous areas in it that are not background. And it is just our background filling algorithm but applied to non-background pixels:
(Different continuous segments have different colors.)
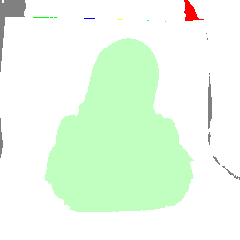
For human it's obvious what is object and what are artifacts. But computer doesnt know it, so we calc number of pixels in each segment and select the biggest
// select one segment as informative and treat all other as artifacts
// informative segment is selected based on placement on the image and size
for x,y
  if current pixel is not background
    var dx = w/2 - Math.abs(x-w/2)
    var dy = h/2 - Math.abs(y-h/2)
    w[i] += dx + dy
var infseg = 0
var maxw = w[0]
for all segments
  if w[i] >= maxw
    infseg = i
    maxw = w[i]
Result:
Done] Of course there're some additional tweaks there and there in the code for better results, but they all similar in complexity.
Determining threshold value
If threshold value is too high, then edges of object(s) will be jagged, if threshold value is too low, then not all background pixels will be filled. And this will result in artifacts around object silhouette:
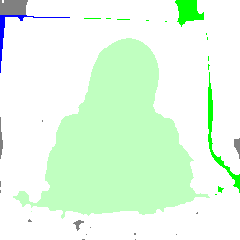
To automatically select the threshold value we can calc convexity of main segment for different values of threshold. If edges of main segment are jagged or have expanded to background, they usually make the segment less convex.
The loop for different threshold values looks like this:
for (var t = mint; t <= maxt; t += step) {
  segmentate(t)
  convexity[t] = calcConvexity()
}
And there how we can calculate convexity value:
for y
  var cf = true // the line being tested is continuous
  for x
    if pixel is in main segment
      // find starting and ending x
      if (x < edge1) edge1 = x
      if (x > edge2) edge2 = x
      // test for gaps
      if (body < 0) {
        body = x
      } else if (x - body > maxgap) {
        cf = false
        break
      } else {
        body = x
      }
  if ((edge1 > edgek*w) && (edge2 < edgek2*w))
    if (cf) convex+
We do this vertically and then repeat horizontally and sum. The resulting value shows how convex main segment is.
In many cases this works well, but it's not fast, so i sometimes just specify some reasonable threshold value manually and usually it works for many photos if they are similar in lighting, white balance and other properties.
Link to the demo. Source code.
You can do the filtering on client side and send canvas to the server (using canvas.toDataURL) or use node-canvas and do all the work on server side.
Hints for better quality photos
If possible, shoot your products in light cube (or at photo studio]). Try to make surrounding lighting bright, avoid direct lighting if possible and use good camera. Also consider using tripod and enabling grid, histogram or other helpers to produce better photos in first place. It is better to underexposure the photo than to overexposure it. Also your camera may have some lighting presets or ability to capture and/or correct white point, they can be helpful too.
Cheers]
shitpoet@gmail.com